Plasti Dip: A Fun, Easy, Cheap Project You Can Do Yourself to Color Your Motorcycle and Parts

Step by step instructions on how to customize your bike with a spray coating that is easily removable

By Tricia Szulewski, Editor

Imagine being able to experiment with painting your motorcycle tank and/or parts with different colors and if you dont like those colors you can erase them. Well thats what Plasti Dip is! Think of it as paint thats removable after youve applied it.

Plasti Dip is a rubberized coating that you apply like paint to your motorcycle tank, chrome parts—or anything else you want to add color to, blacken out, or change its color. Plasti Dip is peel-able, flexible, insulating, and it non-slip. The best part is, if you dont like it, you can just peel it off as it does no harm to the surfaces it is applied to.

So why is it called Plasti Dip? Well, originally, this product was used for tools with no grips or insulating qualities. Youd “dip” the grip end of the tool into the Plasti Dip to provide an insulated grippy “handle” for the tool. These type of dips are still available, but what really intrigues me is the aerosol spray cans of Plasti Dip available in every color of the rainbow including neon versions. Standard colors have a flat finish unless you add a coat or two of the companys Glossifier. Theres also a coating available called Metalizer that adds a shimmering metal affect to the color its applied over.

plasti dip easy cheap project diy color motorcycle parts harley-davidson fat bob
This is my 2009 Harley-Davidson Dyna Fat Bobs chrome air cover and battery covers flat aluminum band after applying four coats of Plasti Dips basic flat black spray.

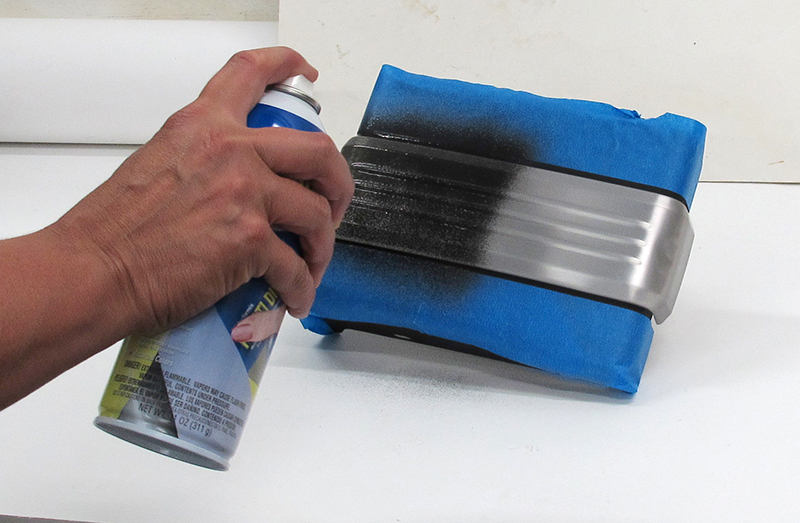
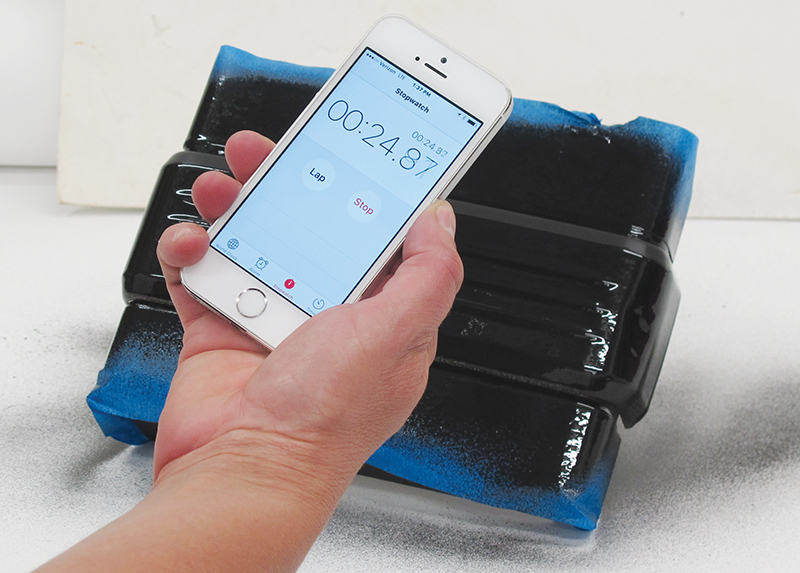
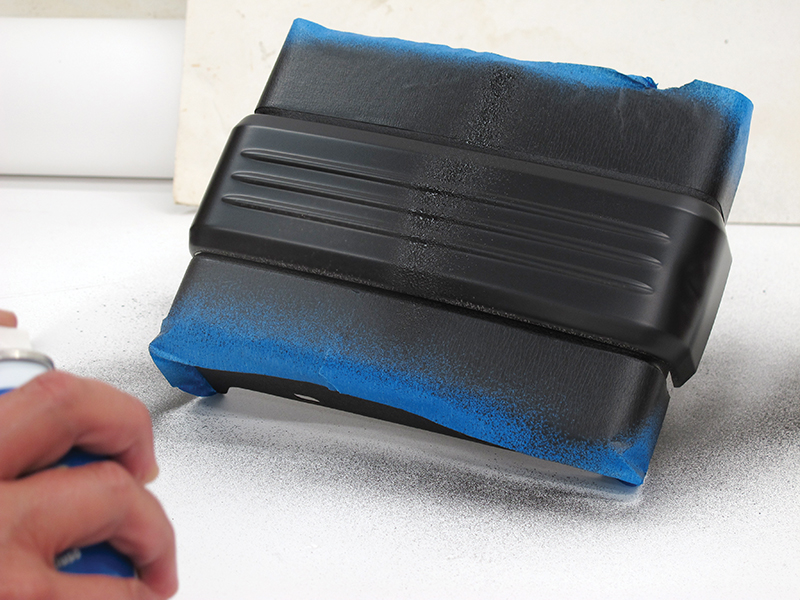
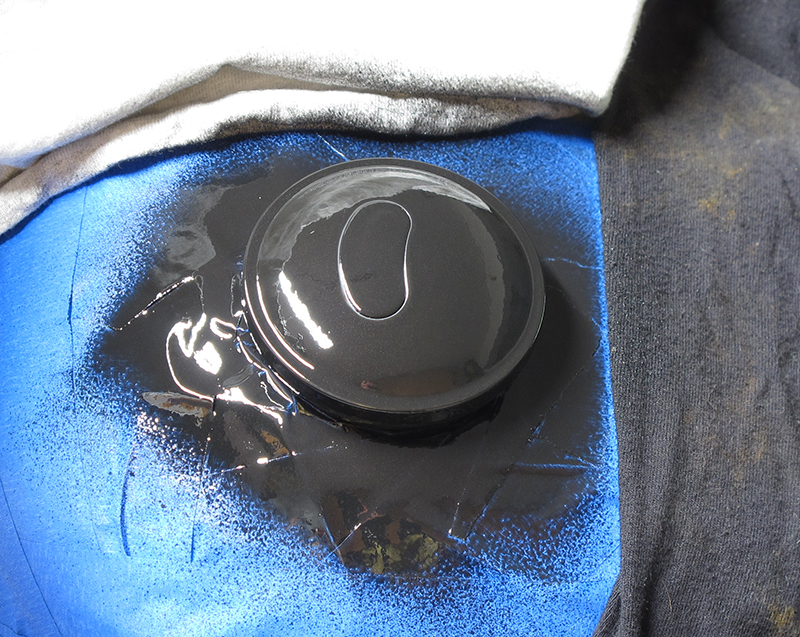
For most of us do-it-yourselfers, the spray paint can version is the way to go for small parts applications. I decided to give the Plasti Dip basic flat black (#11203-6/$8) and Glossifier (#11212-6/$8.84) spray cans a try. If you want to Dip a color, you’ll still want to use either the flat black or white (depending on your project) as an undercoat.

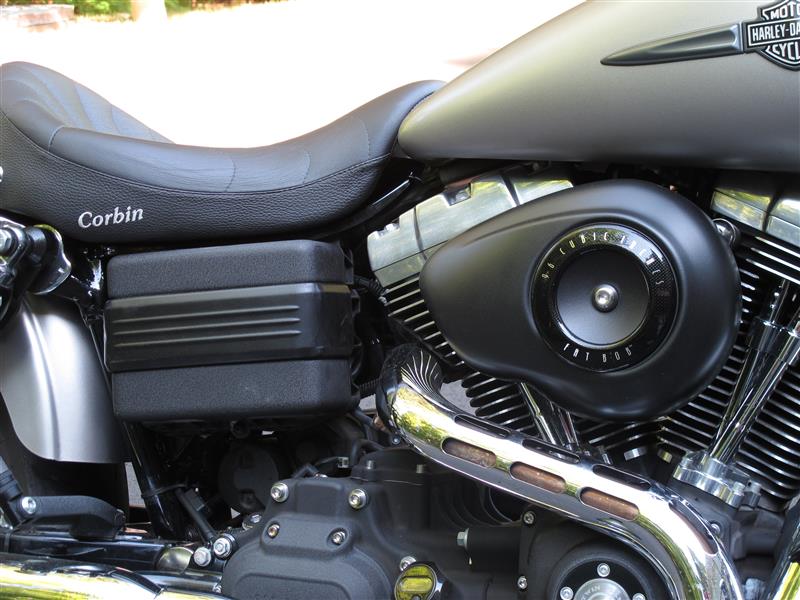
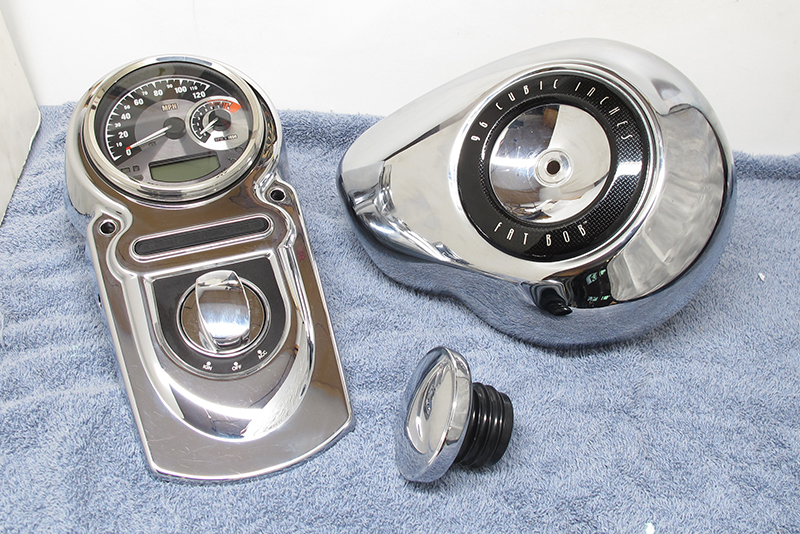
I chose an easily accessible part on my Harley-Davidson Dyna Fat Bob for my trial Dip. It went so well I began dipping more and more parts, blacking out most of the chrome on the bike. Of course, you dont want to apply Dip to any parts that move (fork legs) or get hot (engine, exhaust). “Dipping” actually becomes a strange addiction and there are lots of YouTube videos posted by other “Dipheads” with the same disorder.

plasti dip easy cheap project diy color motorcycle parts supplies
All you need for your Plasti Dip project is masking tape, rags, and denatured alcohol, mineral spirits, or any cleanser that leaves no residue to prep the part to be Dipped.

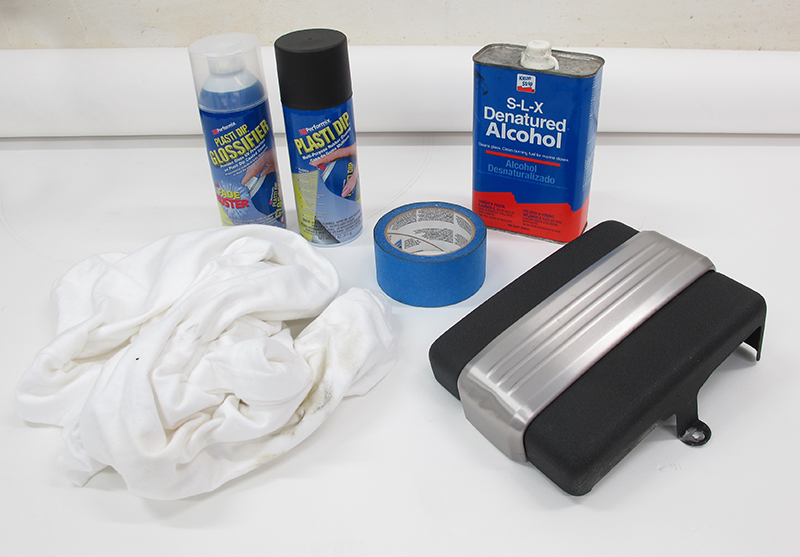
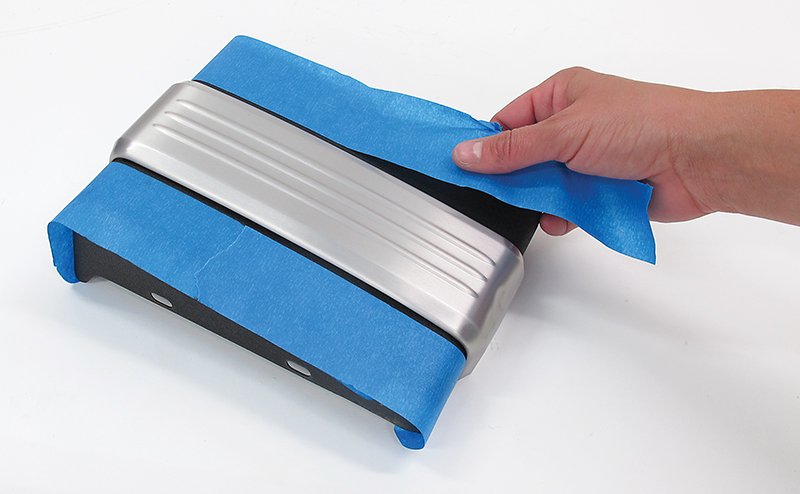
Prepping whatever you want to dip only involves cleaning. There’s no need to scratch or sandblast the surface like when youre doing a regular paint project.

plasti dip easy cheap project diy color motorcycle parts mask
After cleaning the part to make sure there are no bugs, dirt, or fingerprints, tape around the area to be sprayed with masking tape. Note how the edge of the tape is about 1/4 inch away from the aluminum band that I want to be black. Youll see why I did this in a few steps.

plasti dip easy cheap project diy color motorcycle parts spray
The Plasti Dip is sprayed on lightly and in coats, just like a good paint job. Shake the can of Plasti Dip for about a minute to mix its contents. The spray fans vertically out of the can. Hold the can 6 to 10 inches away from the target, and spray side to side.

plasti dip easy cheap project diy color motorcycle parts timer
Set a timer and allow the Plasti Dip to dry for at least 30 minutes before spraying the next coat. You want to spray at least four coats in order to get a good rubberized finished product, so peeling it off is easy to do.

plasti dip easy cheap project diy color motorcycle parts coat
The more coats you paint, the thicker and tougher the coating will be.

plasti dip easy cheap project diy color motorcycle parts masking tape
When the last coat is dry, peel off the masking tape and the excess Plasti Dip. Now you can see how the pliable Plasti Dip just peels away from edges. This is why I left a little extra area to be sprayed—so I could just pull the extra Dip away from the aluminum band, leaving a nice, clean edge.

plasti dip easy cheap project diy color motorcycle parts rubber
So long as you have several coats applied, the extra bits of Plasti Dip peel off very easily. It feels like a rubber balloon when peeled—elastic and tough.

plasti dip easy cheap project diy color motorcycle parts chrome parts
WARNING: Dipping is addictive. After seeing how easy it was to use on the battery cover, I started stripping all the parts from my Fat Bob that I thought would look better in black.

plasti dip easy cheap project diy color motorcycle parts first coat
There are some tricks to spraying the Plasti Dip, like spraying right over details you know youll be able to peel off later. On these parts I sprayed over the speedo display and the fuel cap threads, which Ill peel off once its dry. This is the first of many coats.

plasti dip easy cheap project diy color motorcycle parts on bike
If there are parts you want to spray without removing from the motorcycle, just mask around them to make cleanup easier. You can wipe off overspray but its easier to protect surrounding areas with tape and rags.

plasti dip easy cheap project diy color motorcycle parts spray on bike
Getting all the angles of parts that remain on the bike can be difficult. You really have to move around to hit them all.

plasti dip easy cheap project diy color motorcycle parts peel away
The Plasti Dip peels off cleanly and easily starting from any area with a hard edge. This is the beauty of the product. You can change your colors as easily as you can change your mind.

plasti dip easy cheap project diy color motorcycle parts dyna cockpit
The finished parts on the Harley’s tank look like they’ve been painted. There are only a few rough edges where it started to peel up when I was peeling off the excess.

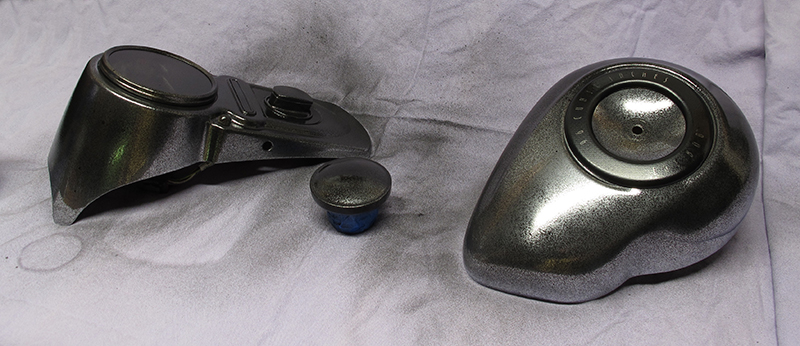
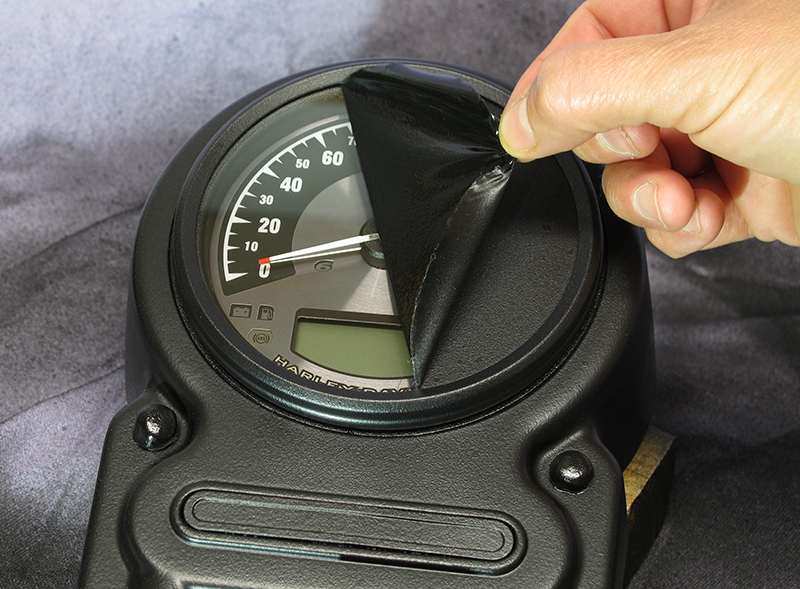
Most of the parts I Dipped on the Harley held the coating as well as I expected. The Plasti Dip faired well in rain and sun, actually protecting the surfaces underneath from the elements. While Plasti Dip acts as a decent protective covering, its not a permanent way to paint your bike by any means. The black Plasti Dip on the air cleaner cover started to wear through after just a few rides, as my knee rubs against it while riding. In hindsight, I should have added a couple extra coats to that part, knowing this would be the case.

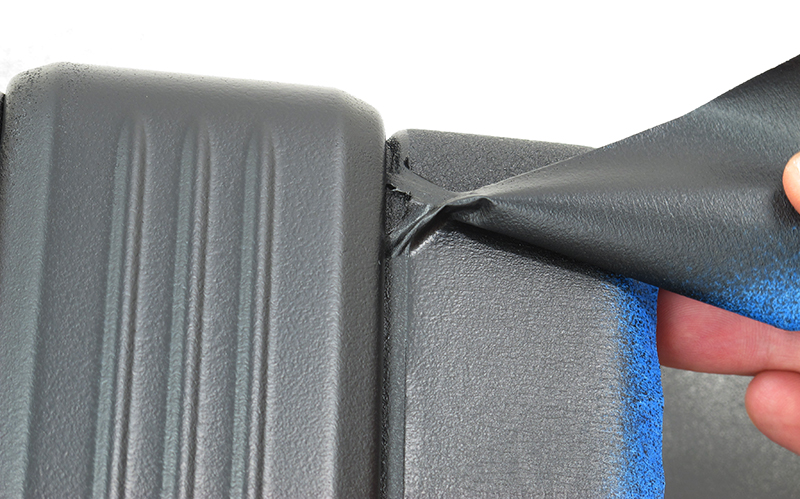
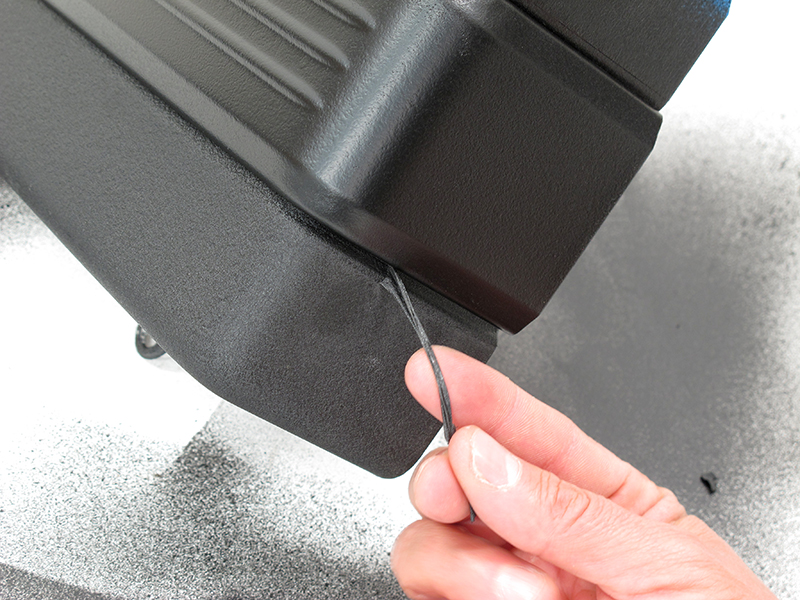
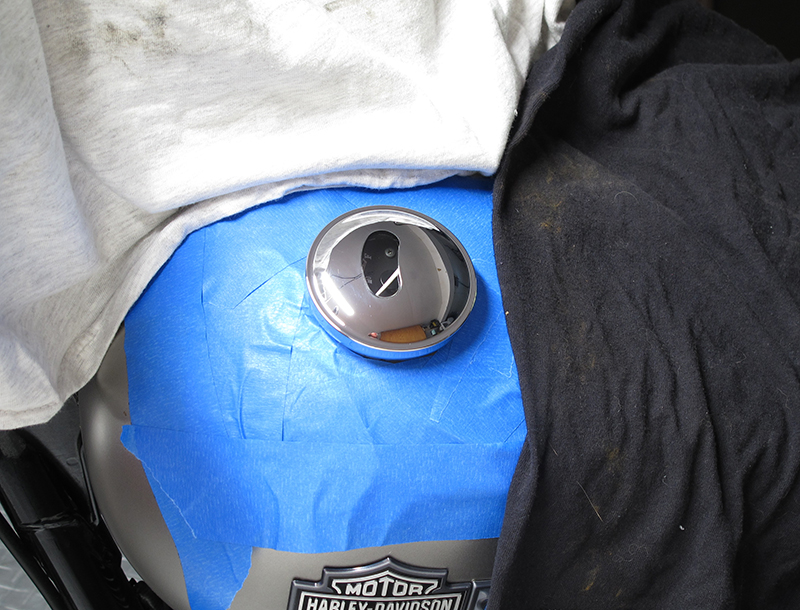
Other parts eventually developed small areas where the chrome shines through. You have to be careful that nothing rubs or scrapes the Plasti Dipped surfaces. Once the Dip starts peeling up, theres no way to reaffix it unless you respray the entire piece.

Even still, the Plasti Dip is a fun and cheap way to see what your bike would look like in different colors and finishes. Visit PlastiDip.com for more information. And if you become a DipHead like me, please share your project photos below in the comments.

Related Articles
Pink Motorcycles
Editors Blog: My Custom Paint Job
More DIY Tech amp; How-To Articles

Scroll to Top